
Laravel File Uploading


Uploading Files in Laravel is very easy. All we need to do is to create a view file where a user can select a file to be uploaded and a controller where uploaded files will be processed.

In a view file, we need to generate a file input by adding the following line of code.

Form::file('file_name');

In Form::open(), we need to add ‘files’=>’true’ as shown below. This facilitates the form to be uploaded in multiple parts.

Form::open(array('url' => '/uploadfile','files'=>'true'));

Example

Step 1 − Create a view file called resources/views/uploadfile.php and copy the following code in that file.

resources/views/uploadfile.php

<html>
   <body>
      <?php
         echo Form::open(array('url' => '/uploadfile','files'=>'true'));
         echo 'Select the file to upload.';
         echo Form::file('image');
         echo Form::submit('Upload File');
         echo Form::close();
      ?>
   </body>
</html>

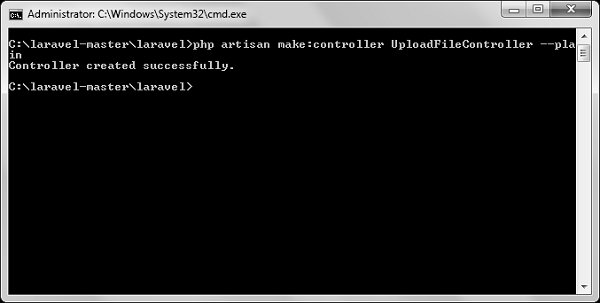
Step 2 − Create a controller called UploadFileController by executing the following command.

php artisan make:controller UploadFileController --plain

Step 3 − After successful execution, you will receive the following output −

UploadFileController

Step 4 − Copy the following code in

app/Http/Controllers/UploadFileController.php file.

app/Http/Controllers/UploadFileController.php

<?php

namespace App\Http\Controllers;

use Illuminate\Http\Request;
use App\Http\Requests;
use App\Http\Controllers\Controller;

class UploadFileController extends Controller {
   public function index() {
      return view('uploadfile');
   }
   public function showUploadFile(Request $request) {
      $file = $request->file('image');
   
      //Display File Name
      echo 'File Name: '.$file->getClientOriginalName();
      echo '<br>';
   
      //Display File Extension
      echo 'File Extension: '.$file->getClientOriginalExtension();
      echo '<br>';
   
      //Display File Real Path
      echo 'File Real Path: '.$file->getRealPath();
      echo '<br>';
   
      //Display File Size
      echo 'File Size: '.$file->getSize();
      echo '<br>';
   
      //Display File Mime Type
      echo 'File Mime Type: '.$file->getMimeType();
   
      //Move Uploaded File
      $destinationPath = 'uploads';
      $file->move($destinationPath,$file->getClientOriginalName());
   }
}

Step 5 − Add the following lines in app/Http/routes.php.

app/Http/routes.php

Route::get('/uploadfile','UploadFileController@index');
Route::post('/uploadfile','UploadFileController@showUploadFile');

Step 6 − Visit the following URL to test the upload file functionality.

http://localhost:8000/uploadfile

Step 7 − You will receive a prompt as shown in the following image.

Browse File


Comments

Post a Comment

Popular posts from this blog

Install MariaDB Latest Version 11.4 in Red Hat Version 9

 This this post i will show you step by step the installation process of mariaDB in red hat version 9. Step1 Run the command to pull the latest updated packages on applications installed in your system. -dnf update If you get Kernal update than reboot the system -reboot Step2 Go to official mariaDB site Make mariadb repository in /etc/yum.repos.d Place the configuration in this file # MariaDB 11.4 RedHatEnterpriseLinux repository list - created 2024-09-24 11:12 UTC # https://mariadb.org/download/ [mariadb] name = MariaDB # rpm.mariadb.org is a dynamic mirror if your preferred mirror goes offline. See https://mariadb.org/mirrorbits/ for details. # baseurl = https://rpm.mariadb.org/11.4/rhel/$releasever/$basearch baseurl = https://mirrors.aliyun.com/mariadb/yum/11.4/rhel/$releasever/$basearch # gpgkey = https://rpm.mariadb.org/RPM-GPG-KEY-MariaDB gpgkey = https://mirrors.aliyun.com/mariadb/yum/RPM-GPG-KEY-MariaDB gpgcheck = 1 Now install the mariaDB with its dependencies package...

MySQL course to learn queries to manage DBMS.

1. Create Table CREATE TABLE statement allows you to create new table in database. The example code is given below.  create table profile( id int, name varchar(50), birth_date date, phone varchar(12), gender varchar(1) ); Code language: SQL (Structured Query Language) ( sql ) 2. Insert data in table INSERT INTO statement is use to insert new record/data into table. INSERT INTO profile (id, name, birth_date, phone, gender) VALUES (2, "Zaib", "1996-03-15", "9238975404", "M"); Code language: SQL (Structured Query Language) ( sql ) 3. Insert multiple records at-once INSERT INTO state is use to insert multiple new record/data into table. INSERT INTO profile (id, name, birth_date, phone, gender) VALUES (1, "Usamn ali", "1990-08-26", "9238785094", "M", 18, "Karachi"), (2, "Aisha", "1997-06-12", "9238974468", "F", 19, "Lahore"), ...

Send email in php "without less secure" restriction

 => https://www.youtube.com/watch?v=Kjn5vBbBsi8 (less secure link) https://www.youtube.com/watch?v=dNTZ8X9Xk_Q&t=259s https://www.thapatechnical.com/2020/03/how-to-send-mail-from-localhost-xampp.html LARAVEL env file setup for gmail configuration MAIL_DRIVER=smtp MAIL_HOST=smtp.gmail.com MAIL_PORT=465 MAIL_USERNAME=exampleEmail@gmail.com MAIL_PASSWORD=yourAppPassword MAIL_ENCRYPTION=ssl MAIL_FROM_ADDRESS=exampleEmail@gmail.com MAIL_FROM_NAME="Adnan Zaib" Note: for TLS use Port : 587 for SSL use Port : 465